Quantcast
Channel: Planet Plone - Where Developers And Integrators Write
Viewing all 3535 articles
Browse latest View live

Martijn Faassen: WebOb and Werkzeug compared

$
0
0

Yesterday I wrote an article discussing why Morepath switched from the Werkzeug library to the WebOb library. I promised a followup with some feedback on WebOb and Werkzeug, and here it is.

Morepath is the friendly neighborhood Python web framework with super powers that I'm working on.

Let me start by stating that Werkzeug and WebOb are extremely similar libraries. There are some minor differences in the details of the Request and the Response object API, but the capabilities are pretty equivalent. It was easy to switch from one to the other.

I am primarily interested in the Request and Response wrappers for WSGI, and my second interest is in the lower-level APIs to handle HTTP.

Lower-level APIs

Werkzeug exposes and documents lower level APIs for HTTP processing. WebOb does not have so much layering, and does not expose a low-level HTTP API.

I like Werkzeug better here. I noticed the lack in WebOb in one point in Morepath: dealing with basic authentication. While Werkzeug exposed an API for parsing the authentication header (parse_authorization_header), WebOb did not and I had to steal code from Pyramid. It would be nice if WebOb included more of such lower-level utility APIs.

Routing

Werkzeug contains a routing implementation, which always bothered me a little; I have my own routing implementation in Morepath and do not want Werkzeug's. WebOb focuses on just request and response handling and is a better fit for Morepath here.

Testing Tools

During my testing I ran into a point where I wanted to test cookies. Werkzeug offers handy test utilities that take care of this. WebOb does not do it out of the box. But I quickly found WebObToolkit, which does offer a Client class with the same capabilities as the one in Werkzeug. I could easily convert my tests from Werkzeug to WebOb doing this, and only have to have a test dependency on WebObToolkit.

args versus GET, form versus POST

Werkzeug exposes URL parameters in a args attribute of the Request object, and WebOb instead offers a GET attribute.

I find the name of the GET attribute slightly wrong, as you can have URL parameters for a POST request as well.

Werkzeug exposes a parsed form in its form attribute, whereas WebOb uses the POST attribute for this. This is also confusing, as it contains the POST body for other HTTP methods as well, such as PUT. In addition with form I get the immediate clue that it's a parsed form, whereas with POST I don't get this clue and in fact I had to check the manual to verify it only can contain form data.

WebOb also offers params, which is GET and POST combined, but Morepath needs specific access, not this combined one. Werkzeug calls this values.

It's easy enough to learn this and only a minor annoyance. Still, I wonder whether it'd be worth it for WebOb to introduce args and form as aliases for GET and POST and then perhaps deprecate the old style.

Performance

As discussed, WebOb is a bit faster for my use cases than Werkzeug. I suspect a lot of the performance in WebOb has to do with the optimization efforts by Chris McDonough, who uses WebOb in Pyramid.

Werkzeug's performance issues may be a regression due to compatibility code for Python 3 -- much of it seems to be due to an excessive amount of isinstance calls that probably have to do with string processing.

Python 3

Both WebOb and Werkzeug are Python 3 compatible, though the way WebOb introduced this compatibility evidently avoided performance issues.

Pyramid Compatibility

While Morepath looks like Flask, it is quite similar to Pyramid under the hood in many details.

When I announced the switch to WebOb from Werkzeug I got some positive feedback -- of course I might've gotten equivalent positive feedback from the Flask folk if I'd switched the other way around; it's impossible to say. I do know that in the Pyramid world there seems to be a bit more of a culture of sharing generic libraries than there is in the Flask world.

People already expressed interest in sharing code between Pyramid libraries and Morepath libraries, and this should now be easier as the request and response objects are shared.

This should in particular make it easier to write tweens in such a way that they work in Pyramid and Morepath both. Tweens are an idea I took from Pyramid and a tween function has the same API in Pyramid and Morepath -- it takes a request and returns a response.

This would involve some refactoring of tween factory code however (or a compatibility layer), as the way tweens are created is different.

Mixins

One thing that bothered me with Werkzeug are the many mixins provided that you can include in the Request and Response objects. It was never quite clear to me what mixins Morepath should be using exactly, except in one case, where I had to involve CommonResponseDescriptorsMixin to make sure the content_type header got set properly on the response -- which I found out only after some debugging.

I don't really see the point of all these mixins; in theory you could include just the functionality you need, but in practice the extra functionality does not really hurt on the original Request and Response objects itself, and I just get confused as what I should use.

WebOb does offer BaseRequest versus Request, where Request adds the AdhocAttrMixin, which seems to maintain all non-webob attributes on the Request in the WSGI environment for some reason. Once I saw the performance drawback that brought, I quickly started using BaseRequest instead.

Debug Server

Werkzeug has a built-in debug server with some interesting capabilities. WebOb does not. I hadn't used the debug server myself with Morepath yet, though I had integrated it, so I didn't feel terrible in replacing it with the server of wsgiref for development purposes. Still, I should look around in WSGI/WebOb land to see whether I can find something similar. Anyone have any ideas?

HTTP Exceptions

Werkzeug implements HTTP exception classes, and WebOb does too. This means you can raise a HTTP exception and have the framework catch it and use it as a HTTP response. Very convenient, and I use it in Morepath.

But Werkzeug actually documents the HTTP exception classes available, and I can link to them with the Morepath documentation using intersphinx.

WebOb does not offer API documentation for its exception classes, and I had to look at the source. It would be nice if WebOb included API documentation for these.

Conclusion

The two frameworks are pretty equivalent. There are not really very strong reasons to pick one over the other.

Werkzeug does a bit more, which is sometimes nice and something more than I need. Werkzeug also has better API documentation. On the other hand it offers a complex system of mixins.

WebOb is faster, and a bit closer to the goldilocks zone for the purposes of Morepath: not too much, and only rarely too little. It should also not be hard to improve WebOb in the areas where Werkzeug is nicer. There's also the hope of more code sharing with the Pyramid ecosystem.

Hopefully this article will be helpful to those trying to figure out what WSGI request/response implementation to use, and also to the maintainers of Werkzeug and WebOb themselves.

Let me know what you think!


JC Brand: New spelling and grammar checker for TinyMCE

$
0
0

The spellchecker "After the deadline" is now available as an add-on for TinyMCE in Plone. It's multilingual, open-source, platform agnostic and even does grammar checking.

I've actually already added this add-on two months ago but didn't get around to mentioning it.  After the deadline is an open-source spelling and grammar checker that can be integrated with web based WYSIWYG editors, such as our beloved TinyMCE.

This new spelling checker provides some advantages over the existing (and still default) IESpell. Firstly, IESpell only works on Microsoft Windows. Secondly, IESpell is only free for non-commercial purposes. After the deadline however is open-source (GPL license, see here) and platform agnostic. Oh, and it's multilingual as well! To top it off... the killer feature, for us at least, is that it has a grammar checker. Pretty impressive IMHO.

The actual thing doing the spellchecking, is a Java server app, which you should download and install on your own server. There is a public default option for testing and demonstration purposes, but it comes with no guarantees.

After the deadline is included with all Products.TinyMCE releases since 1.2.1, but it's not the default spell checker. To enable it is at least straightforward.

Enabling AtD in TinyMCE for Plone:

  • Go to the Plone control panel and click on "TinyMCE Visual Editor"
  • Click on 'Toolbar' (middle left)
  • Make sure that 'spellchecker' is checked.
  • Click on 'Libraries' (top right)
  • Under Spellchecker plugin to use, choose After the deadline
  • Under AtD Service URL, choose your ATD server's URL. (The default is their - public service)
  • It's however recommended that you install your own AtD spellchecker service
  • See here for more details.
  • You should now have After the deadline enabled and have a spellcheck button in your TinyMCE editor.

If you'd like a demonstration of ATD, click here.

Oh, and if you find any spelling/grammar mistakes in this blogpost, it's because I'm still using Products.TinyMCE 1.1.6 ;)

UW Oshkosh: News for Plone Symposium Midwest 2014

$
0
0

The Plone Symposium Midwest planning team has been busy putting together this year's event, which will be Plone's only North American (non-sprint) event for 2014.  

Here is what we've been up to:


The Symposium will take place in sunny (and warm!) Oshkosh, Wisconsin, where the ice cap is currently melting:

  • June 13-17: training classes
  • June 18 & 19: main talk days, Birds of a Feather
  • June 20-22: sprints
 
We are excited to host the Symposium again and hope to see you here!
 
iceberg melting
 

Plone Emerald Sprint: Plone 5 Buildout

$
0
0

In our upcoming Emerald Sprint we are going to hit the ground running, and a week from now Plone 5 will be much closer to reality.  I hope you all got a chance to go over David’s blog post last week.  Now it’s time to fire up our engines and run the buildout we will be using.  I am posting this on our blog, because thanks to the awesome work done at all previous sprints, the Plone 5 coredev buildout is in the cleanest shape I’ve ever seen a Plone buildout.  And so other Plonistas might enjoy giving our current Plone 5 a whirl.

Sprinters, this is a just a little prep work that will make our Sprint go that much more smoothly.  Please have this buildout ready before you even leave home to come to Seattle.  I had no issue whatsoever when I ran it, and was excited to see Plone 5 running on localhost.  If you run into any problem, let us know, and we’ll sort it out.


First, create a virtualenv (this is something I do every time I start any project, it’s nice to have as much isolation as possible).  The clone buildout.coredev from github, and switch to the 5.0 branch.  Bootstrap it, and run buildout.  That should be it!

> virtualenv emeraldsprint
> cd emeraldsprint
> source bin/activate
> git clone git@github.com:plone/buildout.coredev.git
> cd buildout.coredev
> git checkout -t origin/5.0
> python bootstrap.py
> bin/buildout

Now start Zope and bask in the glory of zero warnings!

> bin/instance fg 

 Finally, just a word on our fundraising campaign:  we are only 20% away from our goal!  If every core contributor gave even just $1, I’m sure we would fly well past the goal.  Every donation helps, no matter how small!

https://www.ammado.com/community/146397


Mikko Ohtamaa: Sublime Text 3 for Python, JavaScript and web developers

$
0
0

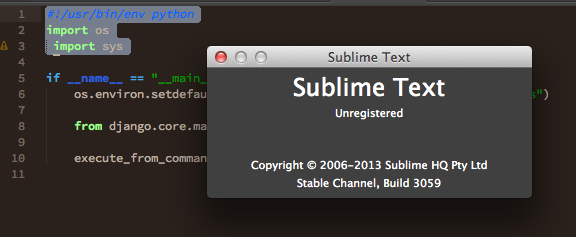
Screen Shot 2014-03-10 at 21.41.07

Sublime Text is a very powerful programmer’s text editor and popular among web and dynamic language developers (Python, Ruby, JavaScript). The editor is commercial (59 USD), though this is enforced through a nagging dialog only. Plenty of Sublime Text’s power comes from the fact that Sublime has vibrant community-maintained plugin ecosystem.

This blog post is revised from an old Sublime Text 2 blog post how to tune your Sublime Text to be a powerful platform. As the writing of this (March 2014) Sublime Text 3 is in public beta and the plugin development for the older Sublime Text 2 is slowly stalling. The most popular plugins have been ported to Sublime Text 3, so if you are a ST2 user should start considering migration to the new version. Sublime Text 3 final release should be out on the first half of 2014.

1. The position of Sublime Text on the programmer’s editor markets

Sublime Text does not try to be full-fledged IDE. It’s strengths include speed (native code + OpenGL acceleration), plugin ecosystem, cross-platform and better usability over hardcore editor choice like Vim and Emacs. You can find support for any programming language in Sublime Text. However, some deep language specific integration features like static analysis and refactoring, though available through plugins, are not that polished.

If you need more heavy tools and you are not well-versed on the command-prompt, you can find PyCharm (Python) and WebStorm (JavaScript) IDEs – both are Java-based. From the more recent alternatives there are Brackets (open source HTML-based) and GitHub’s recent Atom (also built based on HTML technologies). If the two latter alternatives prove that V8 Javascript engine can crank out enough speed to run the editor for large projects, I can see a lot of potential to switch there from Sublime Text. The feature set is in-par, but using open web technologies in the core makes the editor even more extendable.

2. Docs and manuals

There exist a community maintained manual for Sublime Text. You can contribute to it on Github. Check especially customization and settings section.
Also sparse official documentation exists.
Pop in to ##sublime IRC channel on irc.freenode.net to chat with the community.

3. Packages, ecosystem and installation

In Sublime Text, extensions and plugins are called packages. The package is simply a folder on your hard disk and may contain everything from .tmLanguage TextMate syntax highlight files to functional Python code. In ST3 also zip packed extensions are supported with .sublime-package file extension.

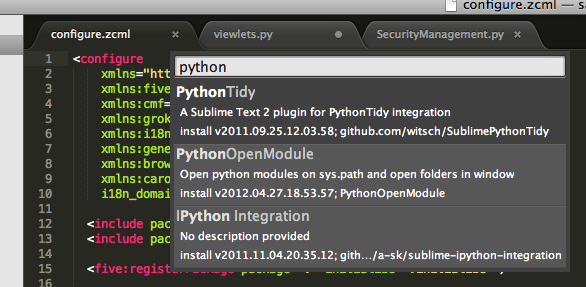
Install Sublime Package Control. Sublime Package Control is a third party plug-in to install and maintain your packages. It enables Install packages command in the command palette.

After Package Control has been installed you can add new packages with CMD + SHIFT + P, search for Package Install in the command palette autocomplete.

Here is my shortlist for packages which I highly recommend for anybody doing Python, JavaScript, web and related development.

4. Installing native dependencies

Some of the packages listed below require native binaries and libraries. Here is how to install native dependencies for SublimeLinter and SublimePythonIDE using OSX Homebrew package management.

# XXX: Not sure if the following is needed on
# clean OSX Maverick + XCode install - try
# first without these
brew tap homebrew/dupes
brew install apple-gcc42

# Install Python 3, NPM and Cabal (Haskell pkg manager)
brew install python3 npm cabal-install
/usr/local/bin/pip3 install pep257 flake8
/usr/local/bin/pip-2.7 install flake8 pep257
/usr/local/bin/npm install -g jshint csslint
cabal update && cabal install shellcheck

4. SublimePythonIDE

SublimePythonIDE gives you Python source code linting, refactoring and static analysis capabilities. It is based on Rope – Python refactoring library. It offers e.g.

  • Go to definition
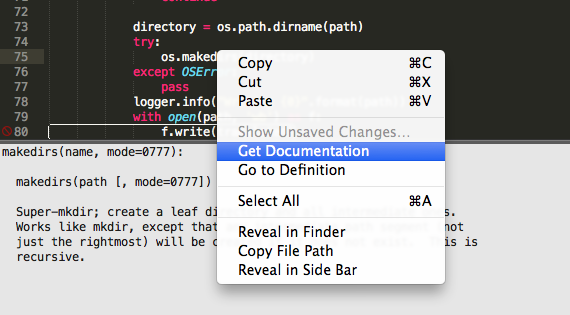
  • Show documentation (shows the function doctstring in Sublime Text console)

Install from Package Control: SublimePythonIDE

Screen Shot 2014-01-28 at 15.27.20

To get the Pytrhon autocompletion and refactoring working for your project

  • Autocompletion settings are per project
  • Open your working folder as a project (Project > Add Folder to Project, Project > Save Project As)
  • Add Python interpreter used to the project settings (Project > Edit Project). In my example I use a virtualenv’ed Python interpreter. Example project settings:
{
    "folders":
    [
        {
            "follow_symlinks": true,
            "path": "."        }
    ],

    // SublimeLinter-flake8
    "SublimeLinter":
    {
        "@python": 2.7
    },

    // SublimePythonIDE
    "settings": {
        "python_interpreter": "/Users/moo/code/foobar/venv/bin/python"    }
}

4. SublimeLinter

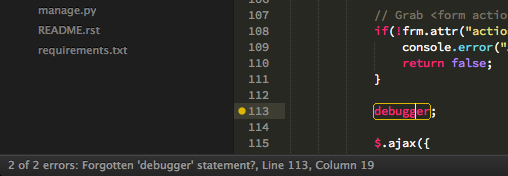
SublimeLinter 3 is a rewrite of original SublimeLinter package. SublimeLinter highlights errors in the source code as you type them. Unlike with the original SublimeLinter, for SublimeLinter 3 you need to install each programming language as a separate package. Recommended packages to be installed from Package Control:

Screen Shot 2014-01-25 at 00.45.19

For Python developers, you can switch the Python linting version on the project level. See the project settings example in above SublimePythonIDE section.

Below is a sample configuration for SublimeLinter where linting binaries have been installed using HomeBrew. To edit the right config file dive into the menu entry Sublime Text > Preferences > Package Settings > SublimeLinter > Settings – User.

{
    "user": {
        "debug": true,
        "delay": 0.25,
        "error_color": "D02000",
        "gutter_theme": "Packages/SublimeLinter/gutter-themes/Default/Default.gutter-theme",
        "gutter_theme_excludes": [],
        "lint_mode": "background",
        "linters": {
            "csslint": {
                "@disable": false,
                "args": [],
                "errors": "",
                "excludes": [],
                "ignore": "",
                "warnings": ""            },
            "flake8": {
                "@disable": false,
                "args": [],
                "excludes": [],
                "max-line-length": 512,
                "max-complexity": 10,
                // 501: line length < 80 chars
                // E128: visual indent of continuation line
                "ignore": "E501, E128",
                "select": ""            },
            "jshint": {
                "@disable": false,
                "args": [],
                "excludes": []
            },
            // pep257 is too nazi by default
            // and you cannot tune it down,
            // thus disabled
            "pep257": {
                "@disable": true,
                "args": [],
                "excludes": []
            },
            "shellcheck": {
                "@disable": false,
                "args": [],
                "exclude": "",
                "excludes": []
            }
        },
        "mark_style": "outline",
        "no_column_highlights_line": false,
        // Include linter paths
        "paths": {
            "linux": [],
            "osx": [
                // HomeBrew installed packages
                "/usr/local/bin",
                // Haskel cabal package manager
                "~/.cabal/bin"            ],
            "windows": []
        },

        // Use HomeBrew Python runtime
        // instead of system default
        "python_paths": {
            "osx": [
               "/usr/local/bin"            ]
        },

        "rc_search_limit": 3,
        "shell_timeout": 10,
        "show_errors_on_save": false,
        "show_marks_in_minimap": true,
        "syntax_map": {
            "html (django)": "html",
            "html (rails)": "html",
            "html 5": "html",
            "php": "html"        },
        "warning_color": "DDB700",
        "wrap_find": true
    }
}

4. Theme – Soda

Soda is an improved theme for Sublime Text. It features e.g. more compact tabs.  I also recommend using Adobe’s free Source Code Pro font, designed specially for source code editing, on OSX.

Package Control: Soda – Theme

Screen Shot 2014-01-24 at 23.08.37

4. Emmet

Emmet is a swiss army knife for HTML editing. Sublime Text is one of the editors with emmet integration. Some of super useful HTML commands it provides are Go to matching pair and Remove tag.

Install from package control: Emmet.

Screen Shot 2014-01-24 at 23.59.37

4. DocBlockr

DocBlockr makes writing C-style /* */ and // comments easier by automatically keeping comment block closed when pressing enter. Type /** and press enter to start comment block in JavaScript or CSS.

Install from package control: DocBlockr

Screen Shot 2014-01-25 at 00.09.15

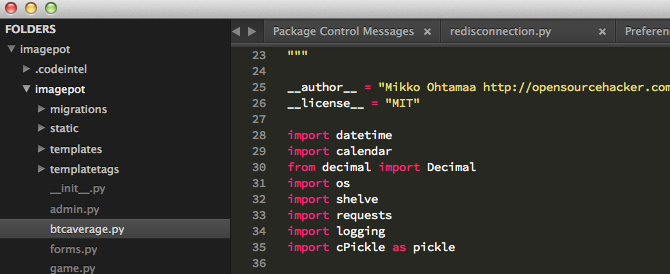
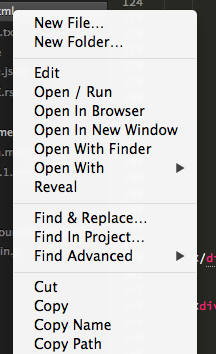
Sidebar Enhancements adds file explorer style actions to Sublime Text project navigator: Copy, Cut, Paste, Remove, Rename files.

Install from package control: SideBarEnhancements

Screen Shot 2014-01-25 at 00.06.22

4. Djaneiro

Django is one of the more popular Python web frameworks. Djaneiro package adds syntax highlighting to Django templates, plus many useful snippets like template basic commands block, load and static and internationalization trans and blocktrans.

To activate Django template syntax highlighting on a HTML file choose View > Syntax > Djaneiro > Django (HTML) on an open HTML file. After this try macros. Type block[tab key] and Djaneiro should create Django template {% block %}… {% endblock %} for you.

Install from package control: Djaneiro

Screen Shot 2014-01-25 at 01.04.38

4. TernJS – JavaScript autocompletion

TernJS is a cross-editor JavaScript language service which provides JavaScript autocompletion.

Note that TernJS needs Sublime Text project-specific configuration for full potential to provide context-sensitive autocompletion and inline help for browser and jQuery functions. Note Some more info about TernJS on Sublime Text. Also your Sublime Text may crash if you have a lot of JavaScript source code without project specific exclude lists (NPM installed packages), as TernJS wants to scan everything by default.

TODO: I could not get sublime-tern to work with ST3 and my project. Either JavaScript scan freezes the editor or the plugin crashes on startup, probably due to high amount of .js files in the project.

4. Other interesting packages

5. Configuring tabs, indentation, other

Never save your files with hard tabs characters in them. The same goes for trailing whitespaces which are against policy of many programming language style guides. (If you don’t believe you should indent with spaces, please check the general opinion regarding this matter).

Drop my recommended ST configuration In the menu Sublime Text > Preferences > File Settings – User:

{
    "auto_complete_delay": 500,
    "color_scheme": "Packages/User/Espresso Libre (SL).tmTheme",
    "detect_indentation": false,
    "detect_slow_plugins": false,
    "file_exclude_patterns":
    [
        ".*",
        "*.pyc",
        "*.pyo",
        "*.exe",
        "*.dll",
        "*.obj",
        "*.o",
        "*.a",
        "*.lib",
        "*.so",
        "*.dylib",
        "*.ncb",
        "*.sdf",
        "*.suo",
        "*.pdb",
        "*.idb",
        ".DS_Store",
        "*.class",
        "*.psd",
        "*.db"    ],
    "font_face": "Source Code Pro",
    "ignored_packages":
    [
        "Vintage",
    ],
    "tab_size": 4,
    "theme": "Soda Dark.sublime-theme",
    "translate_tabs_to_spaces": true,
    "trim_automatic_white_space": true,
    "trim_trailing_white_space_on_save": true
}

6. Custom keyboard shortcuts

Let’s bind Show/Hide Console to an easy-to-access key (§) as the default console key binding is cumbersome and does not work on international keyboards. Drop the following to Preferences > Key Bindings – User.

[
    { "keys": ["§"], "command": "show_panel", "args": {"panel": "console", "toggle": true} }
]

7.  Sublime Text power and shell usage

7. Open files from command-line

The official documentation contains instructions how to make Sublime Text to be available on the command prompt, so that you can open files directly in it.

The recommended way to bind Sublime Text to a command prompt is using alias in your shell configuration file (.bashrc), as this is the least intrusive for your core OS.

Here are instructions how to use Sublime Text as the editor for git (commit messages, interactive merge, rebase, etc.)

7. Open folders as projects from command-line

You can also open folders in Sublime Text.

Just type e.g.

subl src

… and the whole src/ folder is opened in the Sublime Text project explorer (right hand).

Note: One folder = one project = one window? I am not sure if there are ways to have multiple projects in the same window.

7. Searching multiple files

First open a folder as a project in Sublime Text 2. You can do this from the command line, as instructed above, or from File > Open menu.

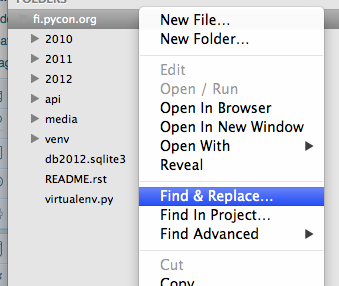
Then right click the folder in the sidebar to search it:

You can also specify a file extension mask as a comma separated in the Where: field.

7. Converting existing files to use spaces instead of tabs

Do View > Indentation > Convert Indentation to Spaces and make sure Indent using spaces is turned on in the same menu. The new versions of Sublime should remember this setting on file type basis.

7. Map file formats to syntax highlighting

If you a have a file format you want to recognize under a certain highlighter e.g. map ZCML files to XML highlighter.

Open any file of the format.

Then: View > Syntax > Open all with current extension as… ->[your syntax choice].

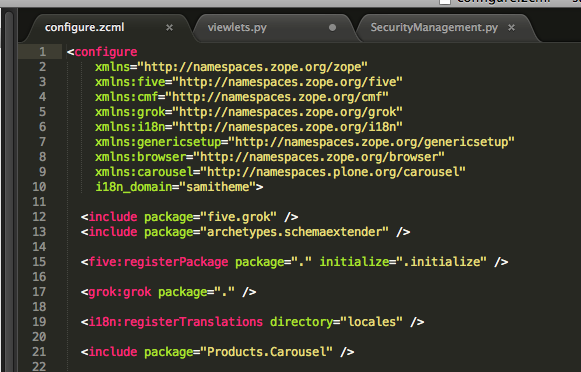
Example of XML-based ZCML configuration language, colorized correctly with XML syntax.

More info.

7. Go to anywhere shortcut

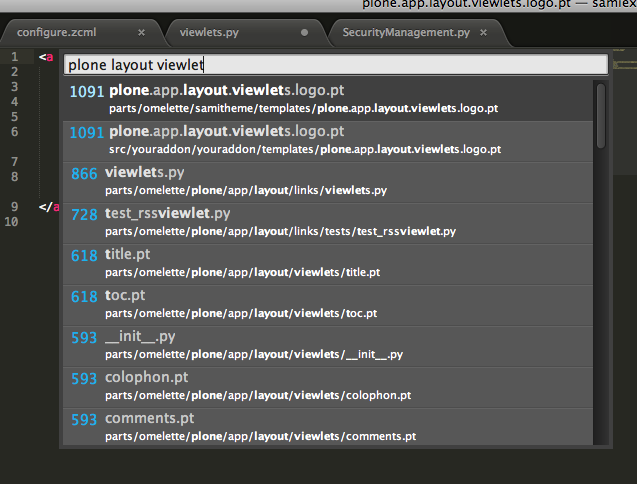
CMD + P. Type in a part of a filename and a part of a function / rule name. You are there. Very powerful, yet so simple feature.

7. Go to line number shortcut

Use Go To Line functionality CTRL+G for more traditional jumps.

7. Context sensitive in-file search shortcut

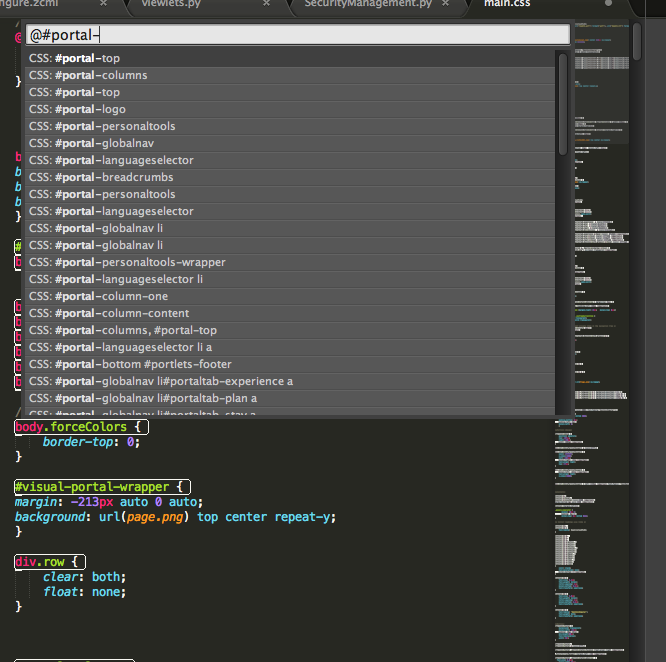
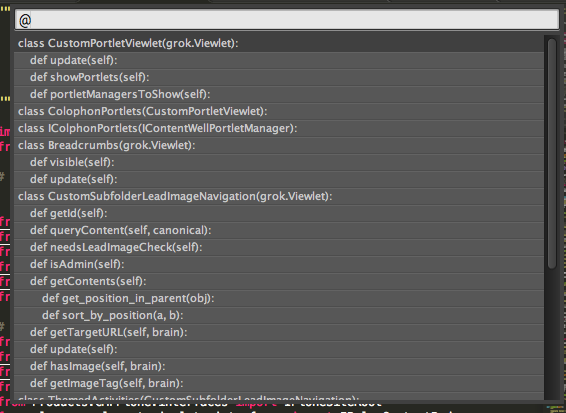
Handy for Javascript, CSS, Python, etc. CMD + R. Type your method or rule name and Sublime automatically jumps into its declaration.

… or in Python …

7. Edit multiple words or lines simultaneously using multi cursor

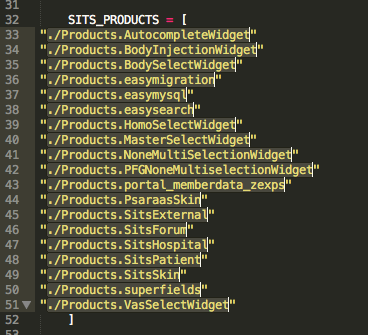
This trick is handy if you need to wrap / unwrap stuff in quotes, add commas, add parenthesis etc. on multiple lines or items simulatenously.

First select lines or items. You can select multiple individual words by holding down CMD and double clicking words. For lines you can do just the normal SHIFT selection.

Press SHIFT + CMD + L to activate the multi cursor mode.

Then edit all the entries simultaneously. Use CMD + left and CMD + right etc. to move al the cursors to the beginning or the end of the linen and so on.

7. Open OS file browser for the currently opened file or any of its parent directories

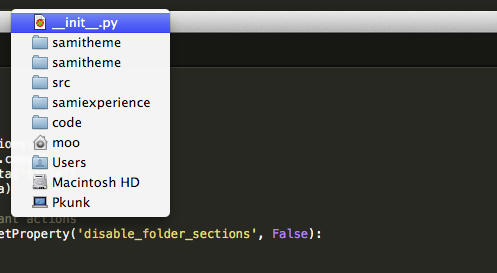
CTRL + mouse click filename in the title bar of the edit window to show the full path to the file and open any of its parent folder. Note: This is OSX’s Finder file browser standard behavior and might not work on other platforms.

8. Syncing and back-uping Sublime Text settings and plug-ins with Dropbox

Here are instructions for syncing and saving Sublime Text settings with Dropbox. The instructions were written for ST2, but should apply to ST3 as well if you correct the folder names.

9. Troubleshooting (especially when installing new packages)

Many packages require separate binaries installed on your system. Sublime Text has a console (View > Console menu) where diagnostics output is procuded on Sublime Text startup and when you open a file for the first time.

Example of failed SublimeLinter-pep257 plugin load crash in Console (had to install script on the system first):

Screen Shot 2014-01-24 at 23.25.48

That’s all this time. Please leave your favorite Sublime Text tips in the comments :)

Buy open source friendly bitcoins Subscribe to this blog in a readerFollow me on TwitterFollow me on FacebookFollow me Google+

Domen Kožar: Why Puppet/Chef/Ansible aren't good enough (and we can do better)

$
0
0

This particular blog post was sitting on my mind for a long time. I don't want to start a flame war, but at the same time I also don't wish for Linux community to build and grow upon ad-hoc solutions that we've accumulated over the last 30 years to the packaging and deployment problems.

History of Linux automation

Remember (old-timer?) Linux user typing commands into terminal that goes and mutates the state of the Linux machine. They'll go and stop a process, change configuration file and start the process again. They's the one connecting to the machine and making sure the state of the Linux machine is mutated correctly. Let's call this method Imperative Configuration.

They'll soon realize there are many routine tasks and there is a benefit of automating them. In old days They'd write a collection of bash scripts, but today we have frameworks in most popular languages to refactor imperative steps and reuse them. Let's call this method Automated Imperative Configuration (as implemented for example in Chef (Ruby) or Fabric (Python)).

Code complexity and the need of a documented operating system soon inspired our Linux user to think further. What if they built one layer of abstraction on top of those steps and rather describe the end state of the system we'd like the Linux machine to be and the underlying system will take care of examining state and executing commands to do so? Something like we use SQL everyday, to focus on WHAT instead of HOW. Let's call this method Declarative Configuration (as implemented for example in Puppet and Ansible)

Taking declarative configuration to the next level

However, there is one huge, seriously huge penalty due to our new abstraction layer. Even more code complexity hidden below the declarative configuration statement someone needed write. Let me explain.

Take for example a simple declarative statement:

Package named nginx should be installed on the system.

Our tool needs to figure out

  • what kind of package manager we're using on our Linux distribution
  • check if package is installed
  • if not go ahead and install it.

There were three steps needed to accomplish such task. The problematic part of such system is the fact our tool had to connect to the machine and examine all of the edge cases that machine state could be in and decide based on the state what imperative tasks to execute. Let's call this method stateful declarative configuration.

Trivial example shown above does not demonstrate how number of combinations of machine states grows exponentially once a decent amount of services interoperate on a Linux machine. Many edge cases our code below delaractive configuration has to cover. Anyone developing Puppet/Chef recipes will be able to explain you this phenomenon in practice.

Going stateless

What if we design our declarative configuration model to be stateless? This would greatly reduce complexity, amounts of code written and at the same time also make it way simpler to explain how different components are written.

Before we dive into that, let's see another real world example of stateful vs. stateless solutions to the following problem:

Securely verify email address of a user registered on a website.

Stateful solution

  1. Generate a random key (cryptographically random, so it can not be guessed)
  2. Store the key in our database
  3. Send email to the user with a link to our website containing the key
  4. Once user has clicked the link in the email, check the random key matches the one in database and hence we know they has gotten the email
  5. Remove the key from the database

Stateless solution

  1. Take email of the user and sign it cryptographically
  2. Send email to the user with the link to our website containing the signature
  3. Once user has clicked the link in the email, verify digital signature and if it's valid, we confirm his email

Our stateless solution did not require a database to keep the state. Actually all the state is transfered over the network, so you could say network is our database or that we don't have any state.

Less work (eg. designing database schemas, extra code), less edge cases you can stumble upon (eg. database migrations).

Stateless solution does require us to be clever. Since there is no state, we have to send over any information we might need for example user registration date. If we used a database, we'd store datetime of registration of the user. In our stateless solution we could use a JSON string with email of the user and his datetime for registration and sign that. Even if we decide to change timespan of when is the registration still valid, we have all the information we need inside our JSON and its signature.

For more about this solution see My Favorite Database is the Network.

Current de-facto standard of stateful packaging

Obviously I'm heading to the idea of packaging software and configuring Linux machines (or any other operating system) statelessly. Let's call it stateless declarative configuration.

Stateless configuration is a consequence of good design of a system (as we have seen for the trivial example of validating email addresses for a website).

I'm not going to propose how to design such operating system to be stateless, because Eelco Dolstra (with two co-authors) already did for us in a scientific paper and we can use such linux distribution with all the benefits of the clean design today.

I will instead summarize (part of) the NixOS Linux distribution design (do read the paper, it's small and slowly explains the motivation and the design) to achieve stateless configuration.

Grab a coffee/tea, relax, get ready.

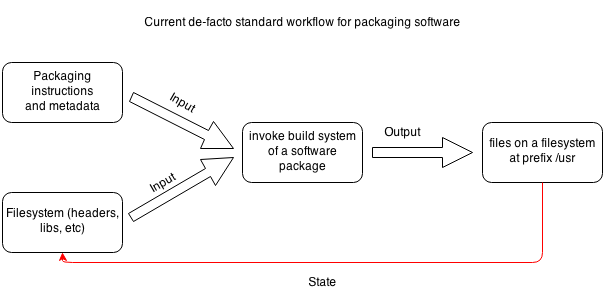
If you think about how packages are installed on a Linux distribution it's summed up in the following diagram:

Alt text

Notice that output files of one software package are also inputs (as the filesystem) to the other software packages.

That's our state. Filesystem is our primitive, hierarchical database that's making our solutions complex and non-deterministic.

/usr could be represented as a table in our database and package does lookups by filename inside /usr/lib, /usr/include and so on. Contents inside those directories will affect our building results. What's worse, building systems will look into other directories such as /usr/local/ or /opt to determine packaging requirement files.

In case you still don't believe me this method goes soon out of control, read this.

Packaging going stateless

Removing our filesystem as a state we get the following workflow:

Alt text

We've changed only one thing:

Output files of a sucessful build are stored under unique $PREFIX directory, so as long as we can map the package name from packaging metadata to its $PREFIX, we can deterministically say headers in $PREFIX/include belong to that specific package.

No more global prefixes such as /usr, /usr/local, /opt from FHS. Software which doesn't assume too much about their prefix will still just work.

Building systems out in the wild also work with unique $PREFIXes. Just pass C_INCLUDE_PATH=$GCC_PREFIX/include:$MYLIB_PREFIX/include, LD_LIBRARY_PATH=$GCC_PREFIX/lib:$MYLIB_PREFIX/lib (and so on) environment variables to the package we're building collected from dependency tree we have in our packaging metadata.

Beyond stateless design

While we're at rethinking packaging, let's go for deterministic builds. Packaging output should depend only on packaging instructions we've written.

Actually all that said, we have to carefully pick a language to specfiy packaging instructions in it.

Our package manager is implemented as a Purely Functional Language.

Pure function is a function without side-effects. Output only depends on the input of the function, nothing else should affect it's output. If it does, it's a bug in the implementation of the language. For example random() is not a pure function, since it takes no input and returns a different results for the same input. By choosing such a language we make sure it's not possible to introduce any state inside our packaging instructions.

Our package manager is called Nix. Nix tries very hard to be deterministic. It stores all build packages at unique prefix and mounts them as read-only to ensure nothing will change the output of the building process once it's done.

It goes as far as changing timestamps from all files inside the prefix to unixtime + 1. Time is a side effect of our build, since two sequential runs should return same result. Term coined to describe packages built with no side-effects is Purity.

Features as a consequence of stateless design

  • Deterministic. Removing stateful filesystem greatly improves determinism. We've solved the same problem at language level by choosing appropriate language. Our builds are deterministic based on our input of packaging instructions (what are dependencies, source tarball, etc)

  • Rollbacks. No state means we can travel through time. Execute --rollback or choose a recent configuration set in GRUB

  • No dependency hell. Packages stored at unique $PREFIX means two packages can depend on two different openssl versions without any problem. It's just about the dependency graph now.

  • Source and Binary best of two worlds. Since we hash all of our inputs to the building process, we can uniquely identify our build. Before build from source is preformed, we can ask our build farm to give us a binary package for the hash (so called substitute for the build). If no hash matches, build from source.

  • Multiple environments. To generate working bash environment with all the declared tool available, we have to symlink them together. Going further, we can create different environments with different collection of software.

  • Multi user. Besides system environment, each user gets it's own environment to install software

  • Atomic. Your system is activated once final symlink is pointed to your system environment. Symlink is an atomic operation on Linux. No more inconsistent states because of power outages.

  • Build farm. Build binary packages based on the changes in git repository, run tests and release it.

  • Provisioning (sysops ready).ProvisionEC2, Hetzner or VirtualBox and configure it.

Often developers would say package managers we use nowadays could adopt this philosophy. I agree, but they would have to be completely re-designed and keeping backwards compatiblity would be of a great challange, if not just impossible.

Stateless declarative configuration

Expanding the idea to configuration management is then trivial based on clever design of Nix package manager. Configuration files are just a simplification of a software package. Packaging instructions generate the configuration file. Following is packaging instructions written in Nix to describe a systemd nginx service.

 1
 2
 3
 4
 5
 6
 7
 8
 9
10
11
12
13
14
systemd.services.nginx = {
  description = "Nginx Web Server";
  after = [ "network.target" ];
  wantedBy = [ "multi-user.target" ];
  path = [ nginx ];
  preStart =
    ''    mkdir -p ${cfg.stateDir}/logs    chown -R ${cfg.user}:${cfg.group}${cfg.stateDir}    '';
  serviceConfig = {
    ExecStart = "${cfg.package}/bin/nginx -c ${configFile};  };};

Inputs:

If any of these inputs change, our nginx is restarted. No code needed to be written.

Example: configure our nginx to build with rtmp support

1
services.nginx.package = pkgs.nginx.override { rtmp = true; };

Input instruction to package nginx has changed, it will be recompiled. $PREFIX path to nginx package returned by function pkgs.nginx.override will change from something like /nix/store/87428fc522803d31065e7bce3cf03fe475096631e5e07bbd7a0fde60c4cf25c7-nginx-1.4.5 to /nix/store/0263829989b6fd954f72baaf2fc64bc2e2f01d692d4de72986ea808f6e99813f-nginx-1.4.5 and thus ${cfg.package} will contain a new path, changing value of an input parameter to systemd service declaration.

Excited? Go install NixOS.

What about Docker?

Docker tries to achieve deterministic builds by isolating your service, building it from a snapshotted OS and running imperative steps on top of it.

Is that the future of Linux configuration management and packaging? I certainly hope not. It's useful for many things, but I don't imagine you'll run your desktop this way.

Stay calm, provision Docker images with Nix

Will more distributions go for stateless design in the future?

4teamwork: OneGov Plone theme

$
0
0

The package plonetheme.onegov contains a modern, generic, and responsive Plone theme we’ve been developing for the past 10 months. We are primarily using it for websites with additional OneGov modules installed. However, the theme is generic enough to work with standard Plone sites, too.

The OneGov theme is not just another Plone theme as it has some neat concepts. In this blog entry, I’d like to present the major technical features of this new theme.

What is OneGov?

OneGov.ch, founded in 2012, is a Swiss association of several software companies and customers who have the common goal of promoting open source solutions in Switzerland. Currently, the major part of the software written is for Plone and is deployed in numerous governmental organizations. The association coordinates the further development of the OneGov Box which consists of different Plone modules (so called OneGov modules) developed and maintained by its respective members. The motto of the association is “Develop once, apply multiple times!”.

Further information regarding OneGov modules is available at onegov.ch (alas, German only).

Key features

The main features of the OneGov theme are as follows:

  • configurable The design has been developed with the goal of making selected parameters (e.g. color, fonts, logo) easily configurable.

The design works out of the box but can be configured individually for different customers. Screenshots of actual sites are available further down in this article.

Configurations can be saved and loaded using the Plone control panel.

  • easy navigation To reach a particular page as quickly as possible, the global navigation can be expanded by hovering over it, and the target page can be navigated to without the need for any intermediate clicks.

  • responsive design In order to display information in the best possible way for mobile devices like smartphones or tablets, the theme automatically adapts to the current display size. Furthermore, on devices with small displays the default navigation is automatically replaced by a specialized navigation for mobile devices (http://www.github.com/4teamwork/ftw.mobilenavigation).

  • slideshow (carousel) Along with the new theme comes a cool product called ftw.slider which makes it possible to create slideshows with images and text.

Tech facts

The theme is using Diazo, and style definitions are defined using SCSS.

The different styles are defined in separate SCCS files and are converted to CSS on the fly using PyScss. Thus, CSS can be parametrized by the site administrator in the Plone control panel – PyScss will do the rest, no CSS knowledge required! This setup makes it possible to make different aspects of the design easily configurable.

The function that generates the CSS first loads defaults for the various global variables, then replaces them with customized values where necessary, and finally loads the style definitions.

After that, the CSS will be generated from SCSS using PyScss:

1234567891011121314151617181920
defgenerate_css(self):css=Scss()scss_input=['@option style:compressed;']# add variablesscss_input.append(self.read_file('variables.scss'))# add overwritten variablesscss_input.append(self.get_options().encode('utf8'))# add component filesregistry=getUtility(ISCSSRegistry)forpathinregistry.get_files(self.context,self.request):withopen(path,'r')asfile_:scss_input.append(file_.read())# add overwritten component files# for now its not possible to add custom stylesstyles=css.compile('\n'.join(scss_input))styles=replace_custom_keywords(styles,self.context)returnstyles

Responsive Design

Basically, the theme is set up in a way which will make it automatically adapt to different display widths.

It consists of four different breakpoints represented by different media queries. The theme will behave as follows:

  • display width > 1200px
    Normal page width of the theme is used, no adjustments are made.

  • display width < 1200px
    Maximal page width is set to 96 percent and the page gets an additional padding of 2 percent to the left and right.

  • display width < 979px (tablet landscape)
    The right column (containing portlets) is displayed below the content area (middle column).

  • display width < 769px (tablet and smartphone)
    The left column containing the navigation portlet is replaced with a mobile navigation using ftw.mobilenavigation

Responsive Design pattern for tablets

Screenshots

Example OneGov.ch

Example www.zg.ch

Customized subsite “Menzingen” and active flyout navigation

Customstyles form

Flyout navigation

Slideshow (ftw.slider)

OneGov theme in action

Check it out for yourself:

Feedback welcome! Please let me know when you use this theme for your sites.


Bo Simonsen: The Scandinavian “curse” – sorting æ, ø, and å

$
0
0

Lately, I have been quite absent from my blog. In fact, just one blog post in February, but wow it has been a busy month. The Cathedral sprint took a week out of the regular schedule, but has really been an experience for me, as mentioned in the earlier blog post. After the sprint we got back to work with refreshed energy to work on our customer’s sites. I have been working on one problem, I found quite interesting so wanted to share it.

In Scandinavia we have some letters, in addition to the regular Latin alphabet which are (notice, the sorting order):

We found out, sorting these letters can actually be a problem. If you rely on standard Python sorting (not general for Python) you get the letters sorted according to their location in the Unicode table (see e.g. here), i.e. each character’s ordinal value. My native language is Danish, and most of our customers are having Danish as primary language. Relying on the order, for sorting, in the Unicode table does not work out; the order there is å, æ, ø and the expected order should be æ, ø, and å; hence we need a better way of sorting the letters.

On a UNIX system, you rely on the locale system to get stuff like sorting order correct. For example, if we create a text file containing, called sorting-test.txt

å
ø
æ

And we execute cat sorting-test.txt |LANG=C sort we get an incorrect result with respect to the right sorting order, since the characters are sorted according to their ordinal values. However, if we execute cat sorting-test.txt |LANG=da_DK.UTF-8 sort the characters are sorted correctly, since the right locale is given, so the system is informed on which sorting to use (collation). By the way, the last example does not seem to work on Mac OS/X (I am using OS/X Mavericks) but on Linux systems it works.

In Plone, this is of course also causing problems. We use a custom adapter to get the sorted_title index correct. This adapter contains the basic functionality from the CatalogTool defined in Products.CMFPlone, but calls the strxfrm function from the locale module simply to get the sorting order correct. The indexing adapter is defined as follows (we place it in indexers.py):

from Products.CMFCore.interfaces import IContentish

from Products.CMFPlone.CatalogTool import num_sort_regex, zero_fill
from Products.CMFPlone.utils import safe_callable
from Products.CMFPlone.utils import safe_unicode

from plone.indexer import indexer

import locale

@indexer(IContentish)
def sortable_title(obj):
    #FIXME: Move it to somewhere it makes sense, or save the old locale.
    #this is not nice, overwriting the locale. Use with caution.
    locale.setlocale(locale.LC_ALL, 'da_DK.UTF-8')

    title = getattr(obj, 'Title', None)
    if title is not None:
        if safe_callable(title):
            title = title()

        if isinstance(title, basestring):
            sortabletitle = safe_unicode(title).lower().strip()
            sortabletitle = num_sort_regex.sub(zero_fill, sortabletitle)
            sortabletitle = sortabletitle[:70].encode('utf-8')
            return locale.strxfrm(sortabletitle)

    return ''

The adapter needs registration, trivially, via configure.zcml:

<adapter factory=".indexers.sortable_title" name="sortable_title"/>

What could be really nice, would be a generic fix in Plone. This solution, as proposed above, may work well for a single-language site. However, for multilingual sites, you may get in trouble. If you have the locale defined to be e.g. Danish, and your site supports other kind of languages, the sorting of strings on the other language relies on the Unicode table, which may not be correct. Let us imagine that the ordering of the Norwegian letters was different, then we would get in trouble for sure. I am not an expert in languages, but I am sure you can find languages sharing characters where the ordering may differ.

So In conclusions, the right solution would involve locale-based sorting (so the language of the object would be taken into account when sorting), which would require extended functionality to the indexer. I am going to dig more into this problem, to figure out a good solution so maybe I will post an update on further findings. In the mean time feel free to comment on your thoughts on the problem.

Andreas Jung: Bad Dexterity application design - what the fuck?

Zopatista - Martijn Pieters: Cross-Python metaclasses

$
0
0

Using a class decorator for applying a metaclass in both Python 2 and 3

When you want to create a class including a metaclass, making it compatible with both Python 2 and 3 can be a little tricky.

The excellent six library provides you with a six.with_metaclass() factory function that’ll generate a base class for you from a given metaclass:

fromsiximportwith_metaclassclassMeta(type):passclassBase(object):passclassMyClass(with_metaclass(Meta,Base)):pass

The basic trick is that you can call any metaclass to produce a class for you, given a name, a sequence of baseclasses and the class body. six produces a new, intermediary base class for you:

>>> type(MyClass)<class '__main__.Meta'>>>> MyClass.__mro__(<class '__main__.MyClass'>, <class 'six.NewBase'>, <class '__main__.Base'>, <type 'object'>)

This can complicate your code as for some usecases you now have to account for the extra six.NewBase baseclass present.

Rather than creating a base class, I’ve come up with a class decorator that replaces any class with one produced from the metaclass, instead:

defwith_metaclass(mcls):defdecorator(cls):returnmcls(cls.__name__,cls.__bases__,cls.__dict__.copy())returndecorator

which you’d use as:

classMeta(type):passclassBase(object):pass@with_metaclass(Meta)classMyClass(Base):pass

which results in a cleaner MRO:

>>> type(MyClass)<class '__main__.Meta'>>>> MyClass.__mro__(<class '__main__.MyClass'>, <class '__main__.Base'>, <type 'object'>)

Four Digits: CMS Garden at CeBIT

$
0
0

I've had the pleasure of attending CeBIT this week. From Monday 'till Wednesday, I was at the CMS Garden stand. Let me explain what that is, what we did there, why it was important and how much fun it was.

First, a word about CeBIT. It is a large IT and technology fair. I'd say it's the largest of its kind on the European continent. It was opened on Monday by Angela Merkel, the German federal chancellor, which is an indication of its impact on Germany's technological and economical environment. It's a real beehive of well tailored ladies and gentlemen (and, luckily, some black t-shirts, too). What are these people doing? When I asked them they were never very clear about it, but it sounded like a mixture of trying to interest people in their product, looking for a product or service, acquiring personnel, looking for a job, seeking cooperation partners, and general interest.


The CMS Garden is an initiative to represent Open Source Content Management Systems at fairs like this. By joining forces, we can afford a presence that is likely to make an impression on visitors, much more so than when each CMS or company would have its own stand. The idea is to promote OS CMSs in general, not our companies. It helps that most CMSs have their own niche, so we don't directly compete. What we try to achieve is more public awareness of our software.

I first got involved last year in Berlin, at the Linux Tag, when my fellow Ploner Maik Derstappen tricked me into helping out at the stand. This was a bit of a home game, as most visitors were already Open Source-minded. The CMS Garden was also present at the DMS Expo in Stuttgart later that year. CeBIT, I was told, is the main event, and I can see why now. There's a lot of people there who are totally not Open-Source minded, so there's a lot to be gained there.

In the world of big companies, Open Source is still a relatively less-known business model. This unfamiliarity is something we can change, and CeBIT is a good place to do so. What we, your loyal CMS Gardeners, do is explain how we make money by giving stuff away, how it's more secure than closed source, how the openness is a good thing for the customer. We explain what we do, we answer the questions, and that's how we try to familiarize people with the concept. We also have glossy pamphlets.

So does this work? It's hard to know. Google Trends doesn't show a significant rise in searches for "Open Source CMS" last week. My presence at the fair has not brought us any leads. We did get a lot of attention from visitors though, thanks to the friendly and open layout of our stand (a brilliant idea). And I had some conversations where I had the impression that my partner was at first not really interested, but got more and more interested as the conversation went on, judging by the questions they asked. Some of these people seemed (I wasn't always able to ask) to be in a position to be influential in choosing IT solutions for their companies. So I don't have any numbers to back this up, except the estimated number of conversations we've had, but I think the CMS Garden is a good way to get more Open Source CMSs into larger businesses.

And why is this fun, exactly? First, I like the game of getting the visitors interested. I also learned a great deal about other CMSs. The questions visitor and fellow gardeners asked me have made me more aware of Plone's specifics. But the best part was, when the day is over, to unwind and have a beer with the other gardeners. The quality that goes into our software comes from our community, and our community (all Open Source CMSs) are a great bunch of people.

PS A couple of thank you's: Floh Klare for CMS Garden coordination, great job! Stefan Luckow for all the prep work, all the talking and smiling all the way. Frank for inviting me to the WordPress meetup. Maik for the Plone coordination. Stefania for the buttons. Mike for his excellent cooking. Peter for the GER-NED replay on the foosball table. And all fellow CMS Gardeners for your companionship. It was great, hope to see you all next year!

https://twitter.com/search?q=%23cmsgarden&src=hash
http://cms-garden.org
http://cebit.de

Zopatista - Martijn Pieters: Cross Python Metaclasses

UW Oshkosh How-To's: How to look up student IDs

$
0
0

With uwosh.pfg.d2c objects we create in our workflow applications sometimes we need to look up a student ID.  

We do not store those in Plone sites because of data security concerns.  

Here is how you can add a button on your D2C objects to look up a student's ID.  This is very easy to do on our Intranet Zope, ie. the Plone server that runs our campus Intranet and the workflow app sandboxes owned by campus units.

Here's what it looks like:

screenshot of the "Display Student ID" button

Requirements

Assumptions:

  • You are doing this on the UW Oshkosh Intranet Zope, ie. either the campus Intranet or one of the many workflow application sandboxes
  • Your form asks for and stores the student's official email address (by default, any PloneFormGen form you create is going to do this automatically)
  • The student's email address is stored in a string field with the ID "replyto" (again, by default, this is what all new PloneFormGen forms do)
  • Only those who have edit permission on the D2C object should see the "Display Student ID" button, to prevent unauthorized users from seeing student IDs
 

Add the Button

Go to the ZMI -> portal_actions -> object and add a CMFAction:

  • Title: Display Student ID
  • URL (Expression): python: 'display_emplid?email=' + context.getValue('replyto')
  • Condition (Expression): python:(object.meta_type == 'FormSaveData2ContentEntry')  and hasattr(object, 'replyto') and getattr(object, 'replyto', None)
  • Permissions: Modify portal content
  • Visible?: True
 

Add the External Method

Go to the ZMI -> portal_skins -> custom and add an External Method:

  • Id: display_emplid
  • Module Name: display_emplid
  • Function Name: display_emplid
This works only on our Intranet Zope.  


Bo Simonsen: Diazo bug on HTML5 validation errors

$
0
0

We have been using Diazo for a long time for styling client sites. I believe the most efficient way of doing Plone theming is for sure to use Diazo, instead of just applying CSS and overriding templates. The clear advantages of using Diazo is:

  • Theme reusability (even outside Plone),
  • Theme developers does not require knowledge on Plone,
  • Possibility of using XSLT without extra modules,
  • Easy backend development (do the markup without thinking of theming).

I am sure there are even more advantages of using Diazo in favor of classic styling.

In the transition of using Diazo, we have of course experienced some problems. Just learning how Diazo rules works takes some effort, but some of the software is for sure not bugless. For example, we tried initially to do the transformation in Apache, but found out it was not really possible (I cannot really remember the details, something on e.g. the path condition did not work). Then we moved on to the a modified version of nginx that had extended support for e.g. path conditions. This worked out great 99% of the time, but we found wierd bugs like fuzzy rendering of the pages, and sometimes the XSLT transformation was not done at all, and it was hard to reproduce/debug.

So what we really found working was Plone’s built-in support for Diazo (plone.app.theming). This works great for sure, we run it on many production sites and it runs very stable. One day we got a bug in from our Q/A department, they had found on some of our customers site’s the HTML5 validation broke due to the usage of line feeds in the description field. The particular elements that broke the HTML5 validation was meta description and the title tag on the links in e.g. the navigation. The result of using line feeds in the description will result in a meta description tag like this:

<meta name="description" content="test test test&#13;&#10;test test test" />

Every time this page is referenced from the navigation portlet you will see the title tag contains the same. I tried tracing the escaping of the line feeds, and got the result that this was done in lxml. So what to do? In XHTML/HTML4 this is probably accepted behavior and will not break the validation, but lxml does not really know if we are dealing with HTML5 or XHTML/HTML4. I filed the bug (#13871), but unfortunately no response so far I am expecting that people are busy working on Plone 5. I see two (three) solutions for this problem:

  1. Ensure that the description fields does not allow line feeds. In case an editor puts in some text that contains line feed, just strip them out and maybe replace them by white spaces. We may need also to migrate previous contents.
  2. Fix the bug in lxml, this would involve C programming and will also be tricky due to the problem I earlier described on XHTML/HTML4 vs. HTML5.
  3. Using an ITransform adapter that removes the linefeeds, see my example here (which we are using currently).

I am sure the first one is the way to go. When I get some spare time I will try to see how it will work out on Dexterity-based content-types. What do you think? Feel free to comment on the bug (#13871).


JC Brand: Collaborative editing of HTML with TinyMCE not going to happen soon

$
0
0

TL:DR: Collaborative editing doesn't work well with XML/HTML. Right now, the solution seems to be to use Markdown instead.

During my talk on XMPP applications in Plone, someone asked whether I was aware of any issues with regards to collaborative editing in TinyMCE.

I don't exactly remember my reply, but it came down to "no", I wasn't aware of any problems with it. Just the next day however, at the sprints, I encountered a fundamental problem with regards to collaborative editing of Rich Text through TinyMCE.

The problem lies in the fact that the Diff-Match-Patch is meant for plain text only. It has no concept of structured content such as the a DOM-tree and can therefore create problems when one tries to patch HTML content. It seems that mainly two things can happen. Firstly, because your HTML nodes are not atomic, they can be broken by the patching algorithm inserting text inside them. Secondly, the patching can result in HTML nodes appearing in the wrong order. (See what the author of Diff-Match-Patch had to say about it on the project page and his excellent explanation on stackoverflow).

Ideally one should use a patching algorithm that is tree-based and which will maintain the integrity of the DOM-tree. When using the plain text algorithm, there are however two approaches to try and mitigate the above issues.

  • Strip all HTML tags, diff-match-patch the resulting plain text and re-insert the original tags.
  • Replace all tags with Unicode chars outside of the used range (thereby making them atomic), apply diff-match-patch and then restore all tags.

The problem with the first approach is that your markup is now immutable. So any markup changes a collaborator makes (e.g bold, italics, heading or other formatting) will be discarded. I think this is a dealbreaker and rules out this approach.

The problem with the second approach is that even though your HTML nodes are now atomic, they might still appear in the wrong order.

Because of this, I think trying to do collaborative editing via an HTML-based Wysiwyg editor is not the way to go. Instead, a Markdown editor (such as Epic Editor) seems to be the way to go. Markdown is plain text, and therefore doesn't suffer from the problems mentioned above.

I think I have created the impression at the Plone conf that production-ready collaborative editing via TinyMCE will soon be a reality, and for that I would like to apologize.

Quintagroup: Collective.clipboardupload

$
0
0

Collective.clipboardupload is a Python package that is developed to simplify the process of inserting images into visual editor in the Mozilla Firefox web browser.
Since drag-and-drop image inserting will be possible by default only in Plone 5, collective.clipboardupload provides minimal functionality to make work with images in TinyMCE easier in earlier Plone versions. Collective.clipboardupload allows to spend less time on uploading, saving and rendering the image and use advanced Clipboard functions.

After you have installed the product, you can select:

  • printscreen,
  • area of image, opened in, for example, Paint,
  • drag and drop picture from local folder,

and copy it to the clipboard. Switch to Plone TinyMCE and Paste using your browser menu Edit -> Paste or key combination. The picture will be automatically uploaded to the same folder, which contains an edited page, and stored as an image content type. Title is automatically generated and can be changed any time. Furthermore, the path to the image itself upon saving in TinyMCE is rendered as resolveUID link.

See also screencast that helps to use collective.clipboardupload product for Plone. See video tutorial on how to easily add and manipulate images.

Helpful Links

Collective.clipboardupload is compatible with Plone 4.+ and Mozilla Firefox web browser. This package is easily installed, since it is distributed as a Python egg and can easily be installed into buildout.cfg file. To get more information visit the following pages:

Quintagroup: Plone 4 gets social: Short review of the Plone products that help to integrate social networks

$
0
0

Popularity of social networks rose considerably over past couple of years and penetrated all other spheres of the web. Now, when website content can be liked, tweeted or pinned, it is important to be quick and introduce these functions to your website.
Wide number of add-ons give opportunity to integrate most popular social networks into Plone and bookmark favourite content or share it with friends. Here is the short review of the Plone products that help to integrate social networks into the Plone-based websites.

XHOSTPLUS Social
sc.social.like
sc.social.bookmarks
zest.social
collective.addthis
Twitter and Facebook widget
collective.sharerizer
Simple Social
collective.portlet.socialnetworks

XHOSTPLUS Social

xhostplus.social 1.4.6 (2013-06-10) is easy to install and use Plone package that helps to display buttons for the 4 most popular social networks: Facebook, Google+, Twitter, and Linkedin on the Plone site.
XHOSTPLUS.social
After activating XHOSTPLUS Social on the Add-on panel you can configure several options in the Social Network Configuration.

XHOSTPLUS.social settings

sc.social.like

sc.social.like 2.0a1 (2013-07-23) is a Plone package that provides simple Google+, Twitter, LinkedIn, Pinterest, and Facebook integration for Plone website.

sc.social.like

Several features can be configured in the plugin settings:

  • different Plone content types for which plugin can be applied;
  • social network icons that can be displayed;
  • horizontal or vertical button style;
  • plugin-specific configurations for Twitter and Facebook.
  • sc.social.like settings

sc.social.bookmarks

You can use social.bookmarks 1.2.3 (2012-06-12). This particular package adds a Bookmark & Share action to a Plone 4 website pages. Any user can bookmark or share a content from a Plone site to a huge number of services (62 providers already included), for example: Facebook, Twitter, MySpace, StumbleUpon, Google Bookmarks, Yahoo Bookmarks, BlogMemes, blogmarks, Bluedot, co.mments, Bumpzee, connotea, Digg, Delicious, Linkter, MyShare, Netscape, Reddit, Scoopeo, Simpy, YahooBuzz.
You can choose display style: either icons only or bookmark link with options in the popup.  sc.social.bookmarks icons
sc.social.bookmarks
After activating this product in the Add-on panel you can configure its settings in the Add-on Configuration section:

  • choose which of provided services will be used for bookmarking;
  • select for what content type this options will be possible;
  • tick Use as a content action if you want a popup with links to appear only after mouse hovering over Bookmark text, or untick it if you want permanent bookmarks available;
  • tick Show icons only? if you want to display only icons without text. sc.social.bookmarks settings

zest.social

Zest.social 1.3 (2012-09-12) adds a viewlet at the bottom right corner of the page that allows to share content on LinkedIn, Twitter or Google. Additionally there is a print button. It is possible to share page on some other services using a popup menu.zest.social
There are more than 285 services available for sharing and you can quickly search for them using simple popup window.
zest.social search
After activating zest.social product it is important to enable viewlet on the particular page. To do this go to Settings tab on the editing page and tick ‘Show social bookmarking viewlet’.
zest.social settings

collective.addthis

Collective.addthis 1.3.3 (2013-05-27) combines addthis services with Plone CMS. This package produces a viewlet near the bottom of the page. After clicking on the Share button there is a possibility to share the content via more than 285 social network services.
collective.addthis
You can change configurations on the AddThis settings tab. For instance, it is possible to display the most popular social networks icons beside the Share button to make it easier for visitors. Just select necessary icons from the list, choose their order and press Save.
collective.addthis settings
You can add your account name with which you are registered on http://www.addthis.com and you will be able to view statistic information on sharing. Receiving in-depth report you can learn how sharing is increasing your traffic and what interests your visitors. Use this tool freely for your business.  
collective.addthis add option

Twitter and Facebook widget

Embed portlet 1.1 (2012-09-04) allows to embed Twitter and Facebook widget with the respective Like and Follow buttons into Plone website page.
Twitter and Facebook widget
Except activating the app it is necessary to take code from Facebook and Twitter websites. Useful video tutorial is here Plone: embed code from services like facebook, twitter, ....
Embed portlet in Plone

collective.sharerizer

Collective.sharerizer 1.4 (2012-11-29) simplifies the process of adding a third-party widget to the Plone website. It is not bound to any particular third-party tool, but provides a control panel where the needed Javascript widget can be pasted. Some tools that could be used are Add to Any and ShareThis.
collective.sharerizer
In the settings tab you should tick ‘Display Document Actions Icons’ and add code provided by the relevant service. Here is the example of Facebook Like button implementation.
collective.sharerizer settings

Simple Social

collective.simplesocial 1.8 (2013-11-12) is focused on the integration of Facebook within Plone website, including:

  • Like Button
  • Like Box Portlet
  • Feed Form Portlet
  • Post to Facebook Fan Page
  • Custom Facebook Connect Integration

collective.simplesocial
You would need to create your own app on the developers.facebook.com and insert its information to the settings tab.
collective.simplesocial configuration

collective.portlet.socialnetworks

collective.portlet.socialnetworks 1.2 (2013-01-18) allows to add icons with links to your blogger, digg, facebook, flickr, google plus, linkedin, myspace, pinterest, stumbleupon, tumblr, twitter, vimeo, or youtube accounts.
collective.portlet.socialnetworks
After activating the product go to Site Setup -> Configuration registry. Find collective.portlet.socialnetworks there and add links to the social networks you are active on to the record. E.g.:
facebook|http://www.facebook.com/TalkQuintagroup
twitter|https://twitter.com/quintagroup
youtube|http://www.youtube.com/user/quintagroup

collective.portlet.socialnetworks settings
Number of Plone packages for Social media websites integration increases. It is important to choose the one that suits your website or web application. Consider not only display options, functionality, speed, and number of social networks presented, but also the way such add-ons influence Plone website structure and code.
Plone, social networks and Internet in general are constantly developing so it is important to be familiar with the latest trends. Integrate social media platforms to your Plone website and people will find you.

Alex Clark: Virtualenv Support Update

$
0
0

This is you: I use virtualenv all the time and I love it! But I hate having to manually upgrade setuptools within my virtualenvs because the PyPA has been so prolific with setuptools releases lately.

Actually this is me, but it may be you too. If this is you, you may be familiar with the following process. If not, you may want to be.

Virtualenv and setuptools

When a virtualenv is created, virtualenv installs setuptools from a local distribution located in site-packages/virtualenv_support. If that setuptools is out of date, so is the setuptools in your new virtualenv. To avoid having to manually upgrade setuptools within newly created virtualenvs, you can do this:

$ cd /usr/local/lib/python2.7/site-packages/virtualenv_support
$ curl -O https://pypi.python.org/packages/source/s/setuptools/setuptools-3.3.zip

Et voila!

$ virtualenv .
New python executable in ./bin/python2.7
Also creating executable in ./bin/python
Installing setuptools, pip...done.
$ bin/pip show setuptools
---
Name: setuptools
Version: 3.3
Location: /private/var/folders/1k/fmmlqcfn5jsbcqrqsw3q_slm0000gn/T/tmpE4vB1l/lib/python2.7/site-packages
Requires:

If you are a Buildout user, this should save you endless frustration with Buildout attempting to upgrade Setuptools…

attempting to upgrade Setuptools…

attempting to upgrade Setuptools…

attempting to upgrade Setuptools…

Quintagroup: Collective.easyform

$
0
0

Collective.easyform-logo.pngPlone developers constantly search for more efficient ways of Plone performance. Dexterity is a new platform for content types in Plone and will be used instead of Archetypes in Plone 5. As a result there is necessity to create custom forms using Dexterity.
Quintagroup offers new Plone product - collective.easyform that generates web forms that save or mail form input. Easyform provides a Plone form builder through-the-web using fields, widgets, actions and validators.

How to use:

Created-Easyform-Fields.png

  • Select Easyform from the Add new drop-down menu. Choose form title, description and other settings.
  • Add fields or fieldsets to create a unique form that will meet your particular requirements. There are enough basic field types to satisfy any demands: File Upload, Text line (String), Integer, Yes/No, Date, Date/Time, Floating-point number, Choice, Rich Text, Image, Multiple Choice, Text, Password, ReСaptcha field.
  • Continue to customize form by setting the order of fields, defining required and hidden ones, choosing validator, if necessary, and other field type specific settings.

Try it yourself!

Collective.easyform is compatible with Plone 4.3.2. It is distributed as a Python egg and can easily be installed into your buildout similarly to other Plone packages. Visit the following pages to find more information about collective.easyform:

Viewing all 3535 articles
Browse latest View live